Quieter PC
A quieter Computer. My pursuit of no fan noise or hard drive hum.
Running your own web services is fun, but the noise gets old. In an attempt to curb the noise level these little puppies put out, i went through quite a bit of an effort.
The Quiet PC
First of all i wanted to get rid of as many fans as possible, because they make the most noise while also being the first items to fail. Fans are usually found on power supplies, CPUs and graphics cards. I started with the power supply. For a $120 i found a 'FSP Group ZEN 400' at newegg software. While this power supply is more expensive than your usual $40 screamer, it pays for itself in the long run because you don't have to swap fans or power supplies because the fan died. So far all of my power supplies in the last 12 years died because of the fan.
Next was the task to find a graphics card that didn't have a fan. The same logic as the power supply logic holds here. They're noisy and when the fan goes, so does your card. My answer to that was the 'GIGABYTE GV-NX86T256H GeForce 8600GT' nvidia card. Dual head, decent 3D and somewhat reasonable Linux support.
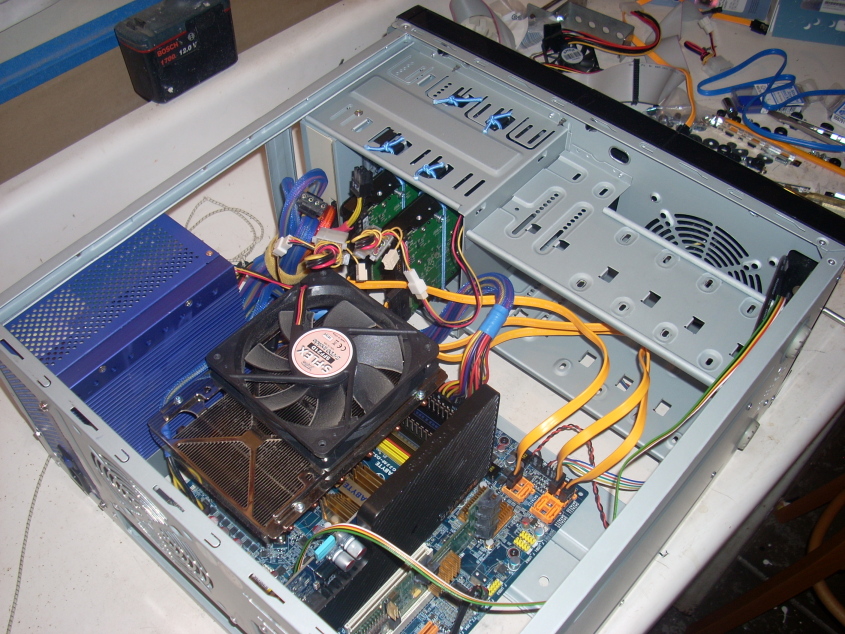
This left me with the CPU. Unlike power supplies and video cards i have found CPU fans to have been relatively reliable, but they still get loud over time. The solution there was a huge sink with a quiet 120mm fan. Now the sink will vary from one MB form factor to another so proper homework must be done on those. I ended up with a 'Thermaltake CL-P0114 120mm CPU Cooler' on one of my systems and another one (in the picture below) of which i don't remember the details at the moment. What is important though is that i removed the fan that came with the cooler and replaced it with a 'S-FLEX SFF21D(800 rpm)' fan. It has a noise level of an unheard of (no pun intended) 8.7 dBA. So the implied requirement for the CPU cooler was that it could take a 120mm fan.
Now i was at a point where the loudest part on my computer was the hard drive. They either have a high pitch whine in the case of my old 7.2k 250GB Maxtors or a growl in the case of my 10k 150GB Raptors. The solution there was to suspend the drive on banjo cords. These knocked the growl dead, but weren't as effective with the whine. There are solutions for this called the Hard drive Sandwich
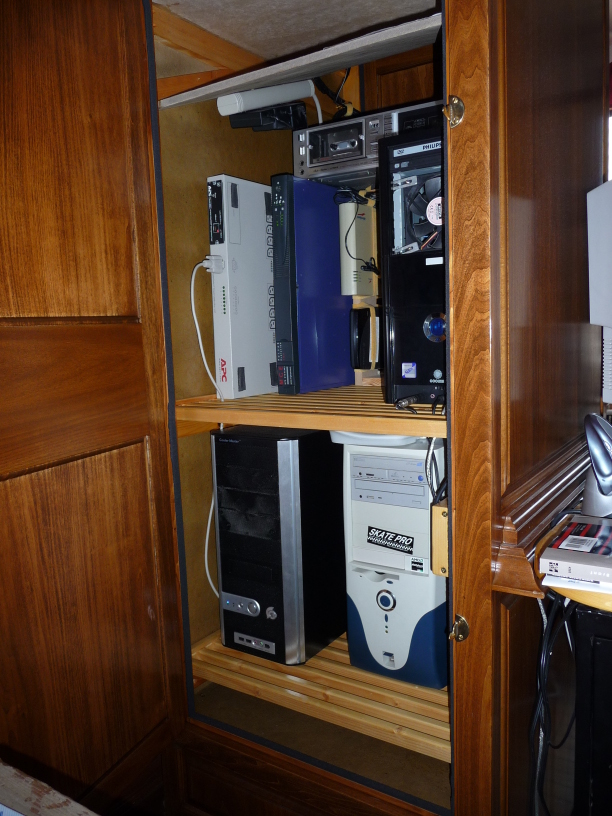
Anyway here's the internals of one of my boxes:
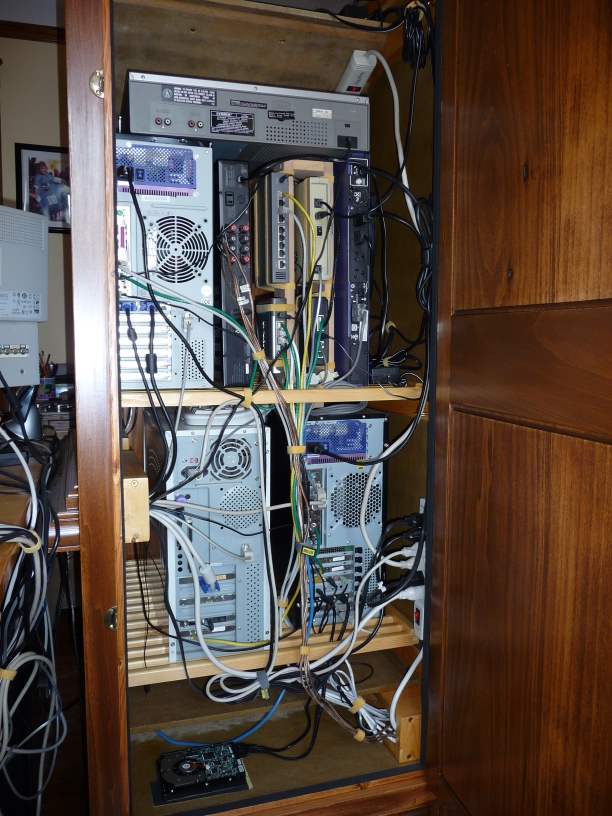
That worked quite well but i was still plagued by the occasional screaming fan of my 1U MGE UPS and the quiet but constant hard drive clicking from Linux's frequent sync cycles. What i needed was a box to stick them into. Then i wouldn't have to look at all of that stuff either. While some may find computer equipment impressive, i find it ugly. So i was to set out and build a sound proof cabinet where i could store the equipment. It needed to provide ventilation, but not let out the noise.
The Cabinet Project
This is what i came up with:
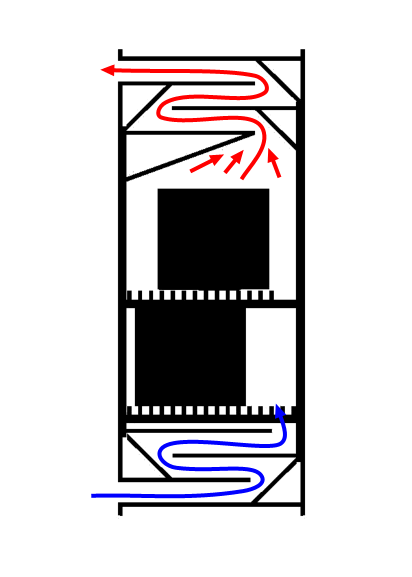
The idea was simple. Sound doesn't like to travel around corners, but air does. And convection would provide the means of ventilation. This turned out to only partially pan out, as i overestimated the force of convection, and underestimated the sneakiness of sound. it turned out that the average temperature in the top of the cabinet was roughly 100 °F/ 38 °C. Also was the cabinet not able to suppress the screaming of my MGE UPS. It was however successful at suppressing the leftover computer noises created by the hard drives. It was also more than successful at getting ugly equipment out of my sight. To remedy the UPS problem, i cut a whole in the top and replaced the little 1U fan with one of my quiet 120mm fans. Sound problem solved. To remedy the temperature issue, i leave the back door just a bit ajar.
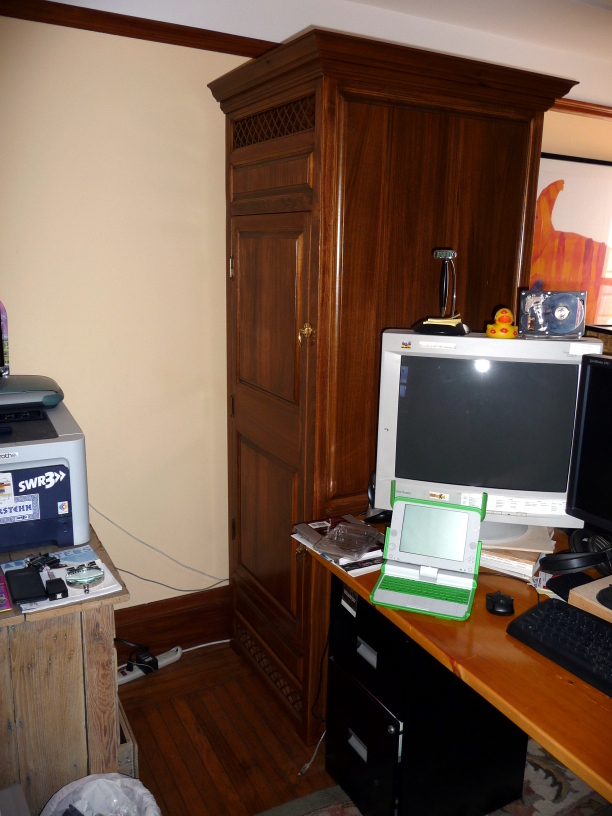
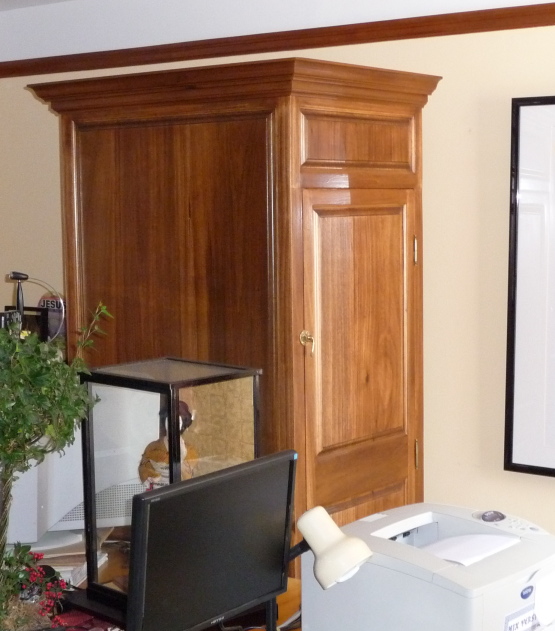
The real thing
Here's what this thing looks like in real life.
This is the front side of the cabinet.
This is the back.
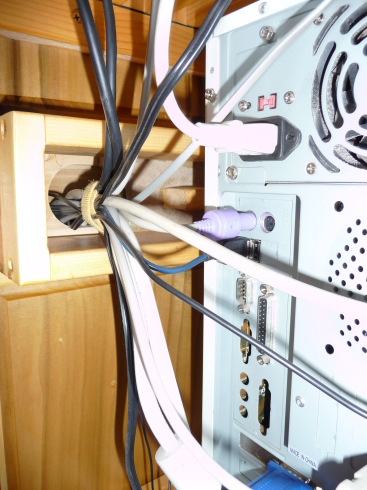
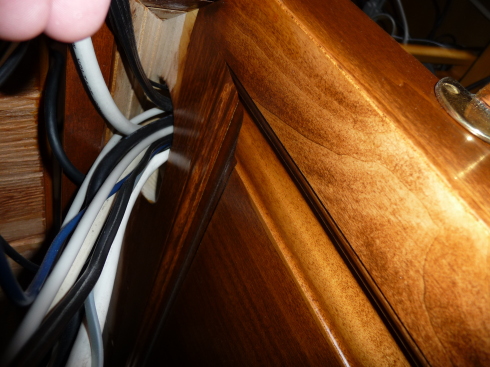
This how i handled cable routing in and out of the cabinet. The are 3 cable ports. 2 by the skirt at the front and back of the cabinet and 1 at back facing the wall. The skirt does a nice job hiding the opening.
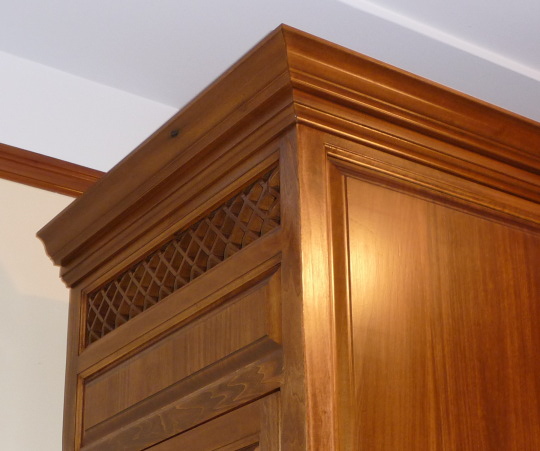
The vent took me 3 weekends to get right.
- 1st weekend, coarse hidden lattice. After building it i thought it looked nice exposed, but was too coarse.
- 2nd weekend, finer lattice exposed. It looked nice, but if it was only beveled like the raised panels.
- 3rd weekend, that was a fun thing to route :)
Finally the outside of the beast. While i must admit that it's sort of larger than life in the middle of the wall, it looks a lot better than all the junk that was there before. And due to it's nature of being double sided didn't really want to go into a corner. Now i just need to figure out what to do with the monitors.